This weather station was created as a university project for the “sensor technology” course. It is based on the ESP32 wroom v1 module, connected to several sensors:
- BME280 - temperature, humidity and pressure sensor
- BH1750 - illumination sensor
- diy anemometer
- YL-83 rain sensor All of that is powered by a single li-ion 18650 battery, charged with a 2W solar panel through a simple TP4056 module.
The ESP is sending data to the Thingspeak server. We can visualize them using the Python app with PyQT graphs that I also wrote for this project.
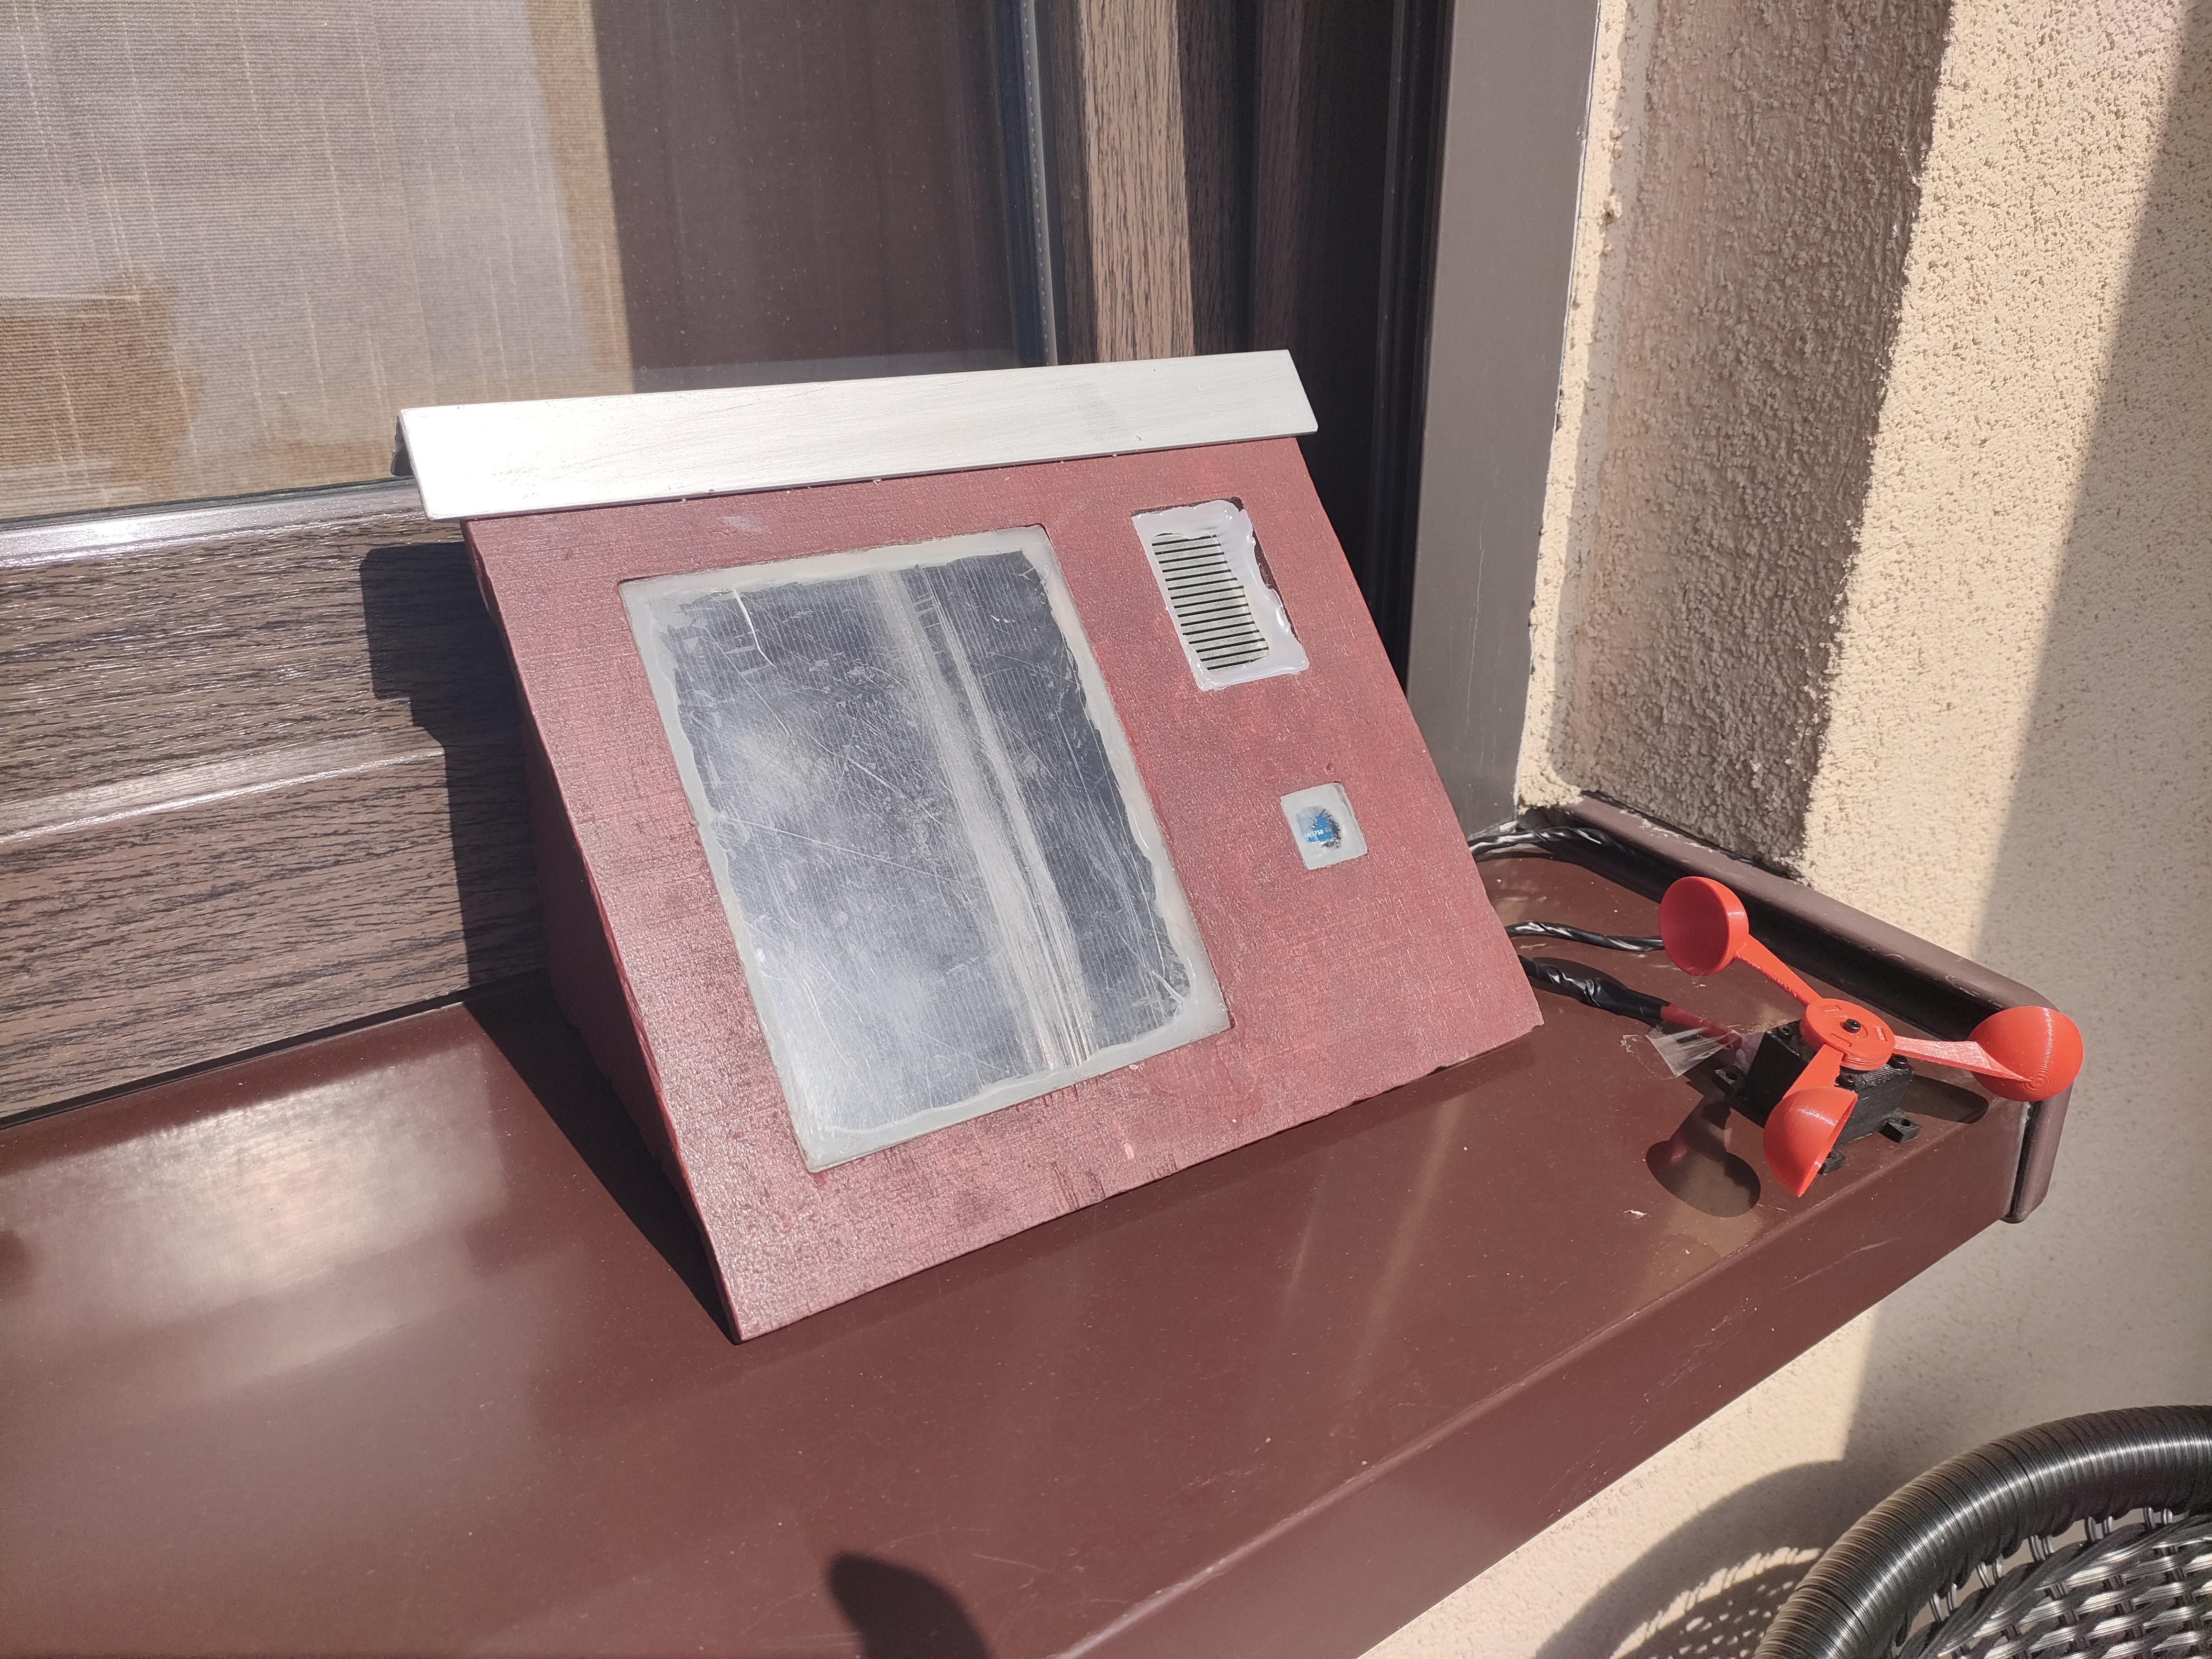
The enclousure that you see below was made from plywood cut on a CNC machine. I also placed a piece of plexiglass in front of the solar panel and light sensor to protect them a bit from rain etc.
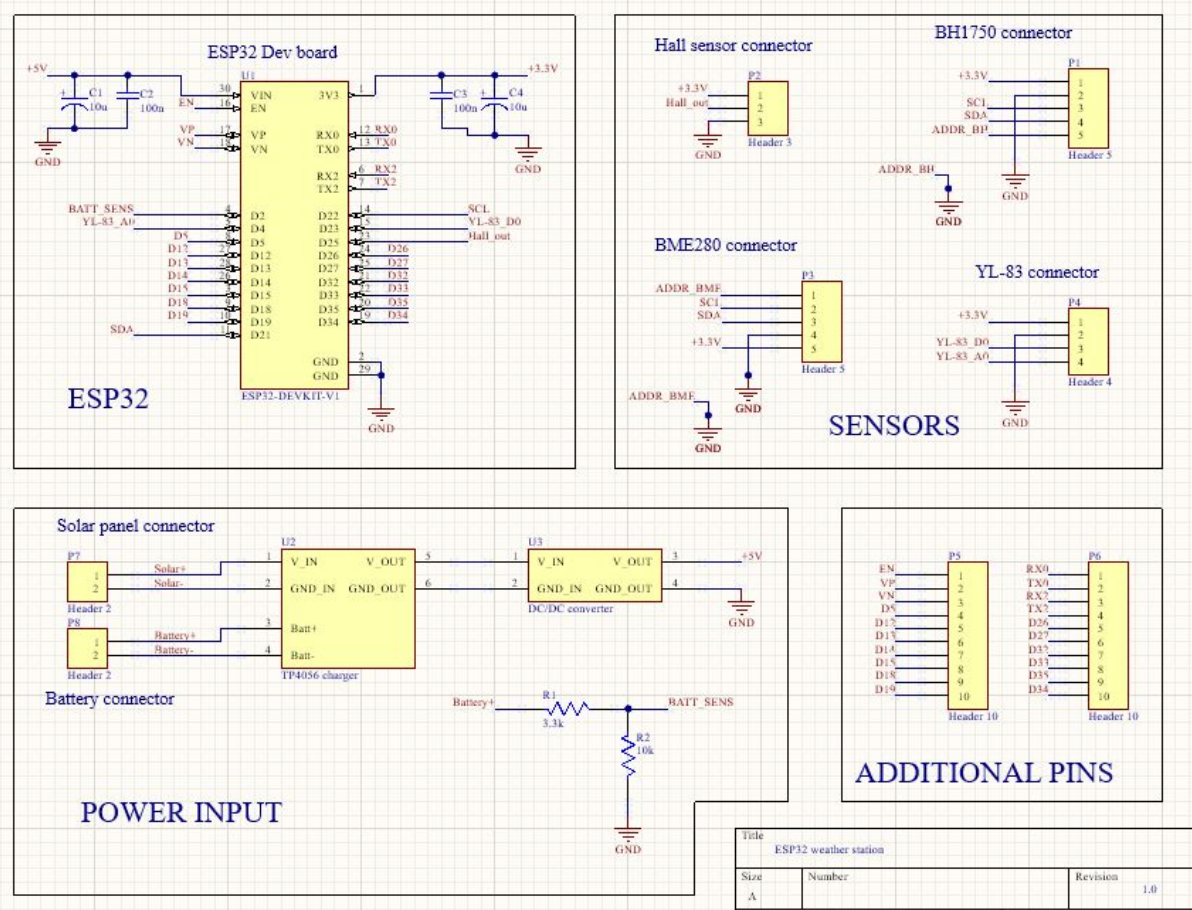
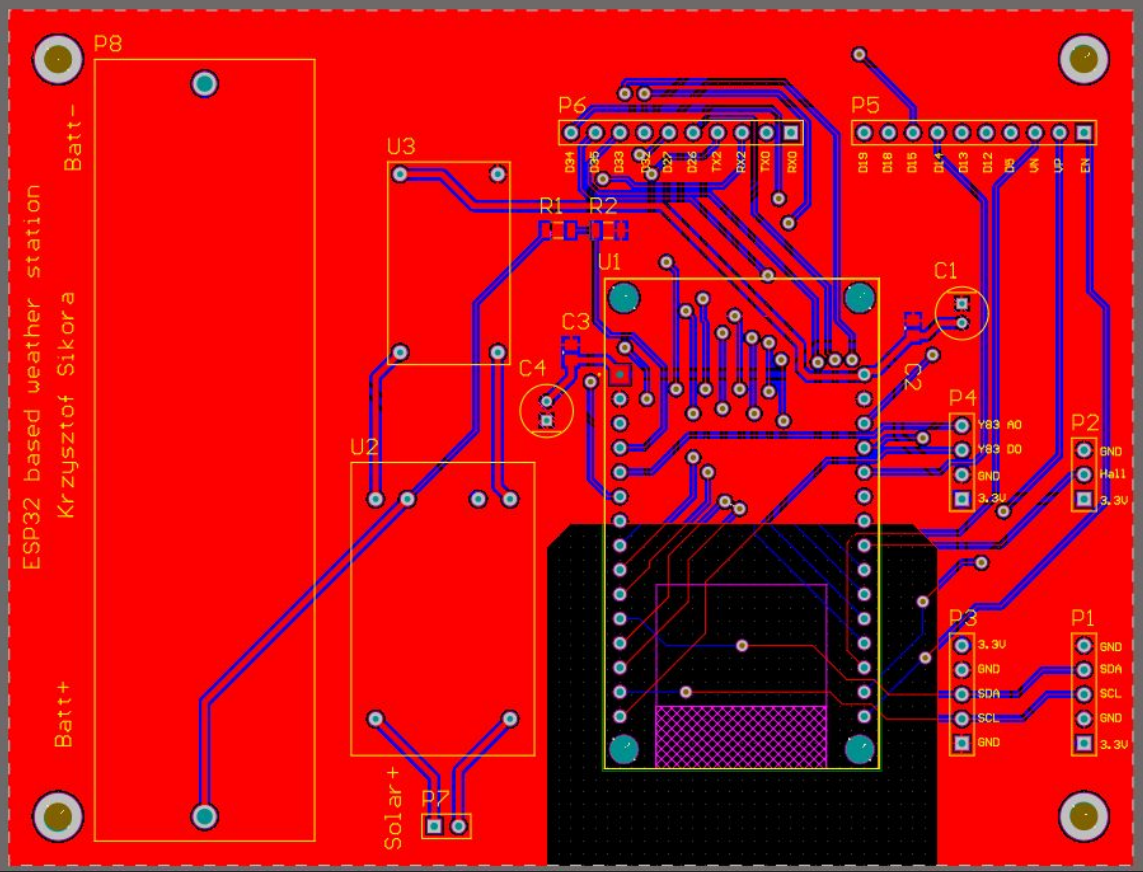
Electronics
The electronics design is pretty simple, consisting mostly of ready to use modules, put together on a simple PCB. That is why I am not gonna go ito the details of it. You can check out the detailed schematics on my github repository.
Schematics
PCB design
ESP32 code
All of the ESP32 code was written in Arduino IDE. All of the code is executed in the “setup” section. At first, the microcontroller connects with all the sensors and start gathering the data.
  float temp = get_temperature_reading();
  float humidity = get_humidity_reading();
  float pressure= get_pressure_reading();
  float altitude = get_altitude_reading();
  float light = get_light_reading();
  float rain = get_rain_adc_reading();
  float wind = get_wind_speed_average();
  int battery_level = get_battery_level();
Then it tries to connect to the wifi network and send the parsed data to the server.
  wifi_setup();
  delay(5000);

  send_data(temp, humidity, pressure, altitude, light, rain, wind, battery_level);
  delay(5000);
After it’s done that, it goes to sleep for a specified period of time to save battery energy.
  esp_sleep_enable_timer_wakeup(TIME_TO_SLEEP * uS_TO_S_FACTOR); //sleep for x minutes
  esp_deep_sleep_start();
Diy anemometer
As the commercially available anemometers are pretty big and expensive I decided to go for a small 3d printed version.
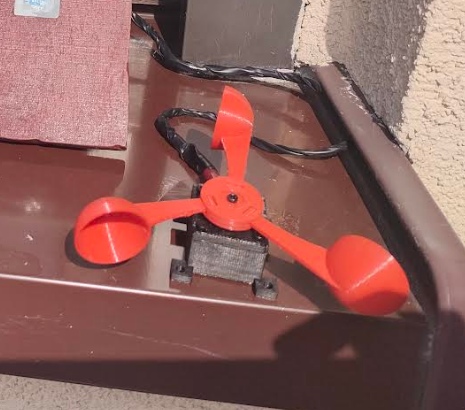
To read the wind speed I use a simple digital hall sensor reading the changing magnetic field from the rotating magnes placed on the anemometer shaft. Knowing how many times the magnetic field changed in a period of time we calculate the RPM and from that, the wind speed.
Python app
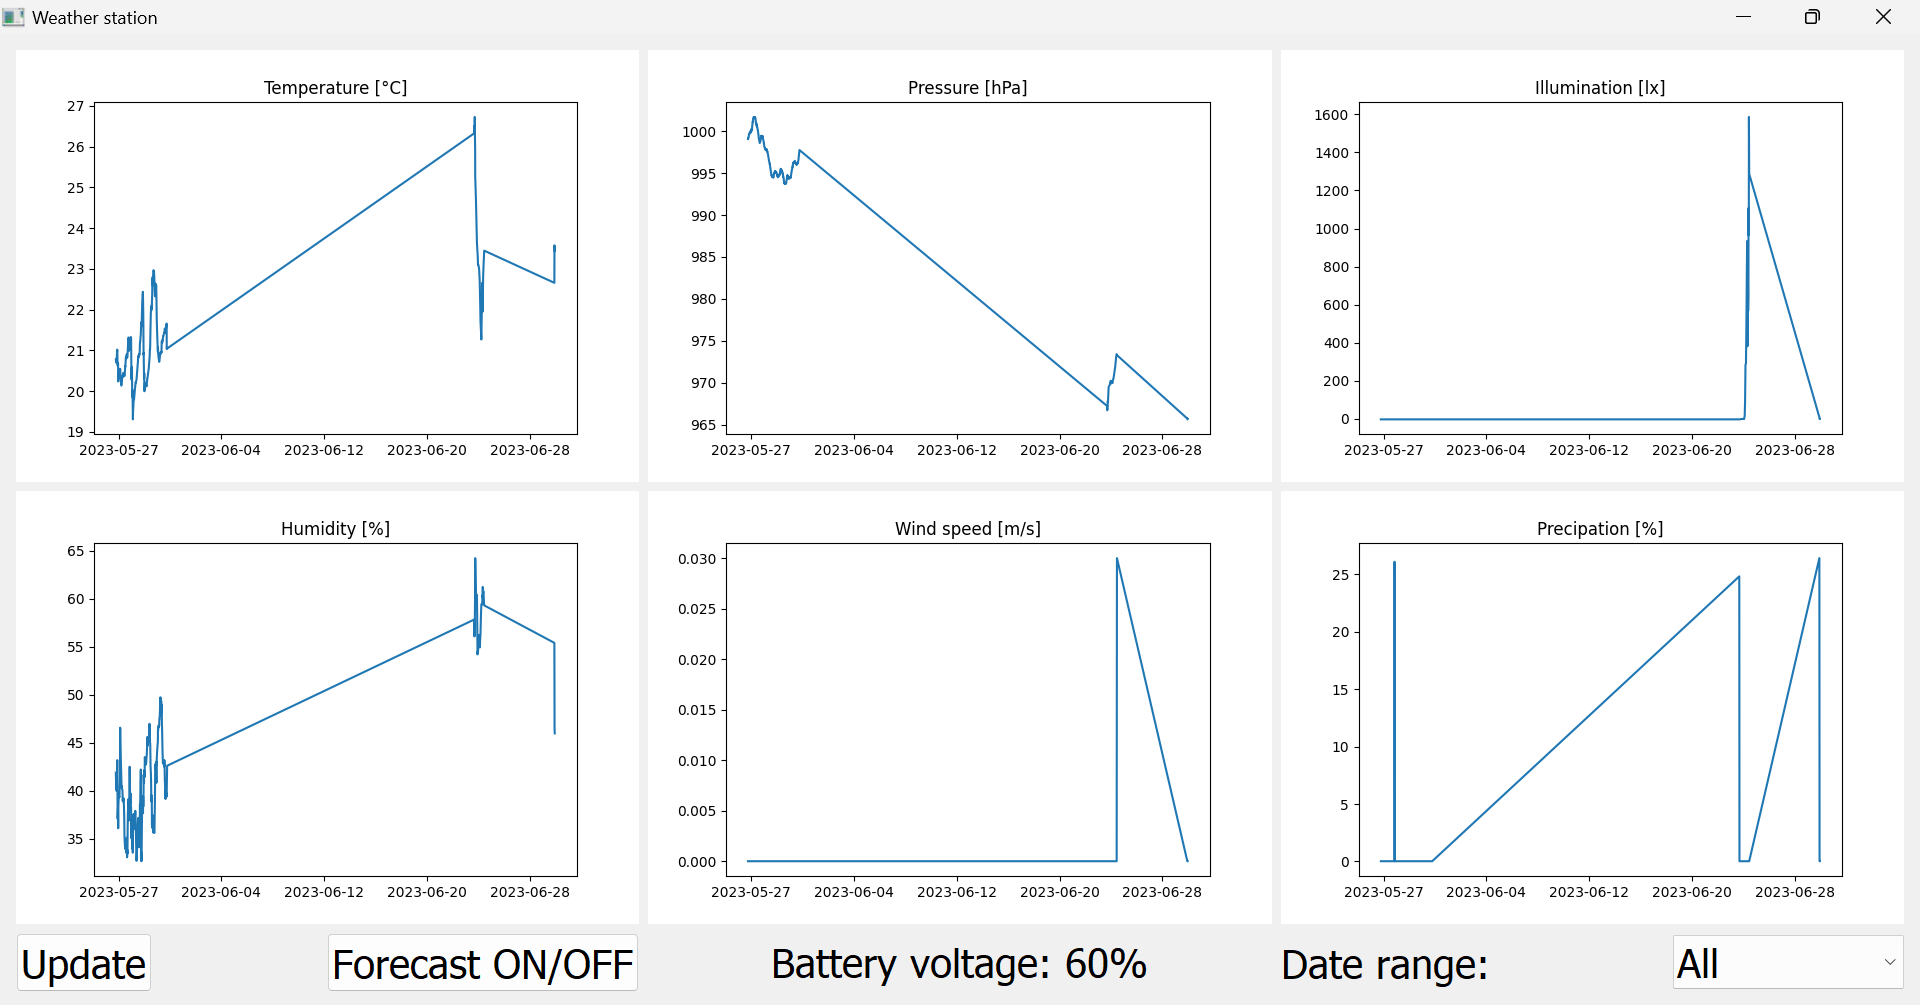
The app you can see in the image above was written in Python using PyQT with matplotlib as GUI. It shows all the basic graphs with data from the Thingspeak server. In the bottom-right corner you can choose the date range: all, last month, last week, last day. The update button makes the app download all the data again and the forecast button turns on the SARIMA forecasting feature. It’s using the statsmodel library with it’s auto arima function that automatically finds the optimal parameters for the statistical model. The forecast is set to take into account the average values for every day and make predictions for the next 10 days (1 for each day). Due to the current lack of consistent data I can’t guarantee it will work correctly and I might make some adjustments in the future.
If you want to learn more about the SARIMA model I suggest you check out this YT channel.
Author
Krzysztof Sikora
Cracow, 06.2023